Leave Requests
Submit and track your time-off requests.
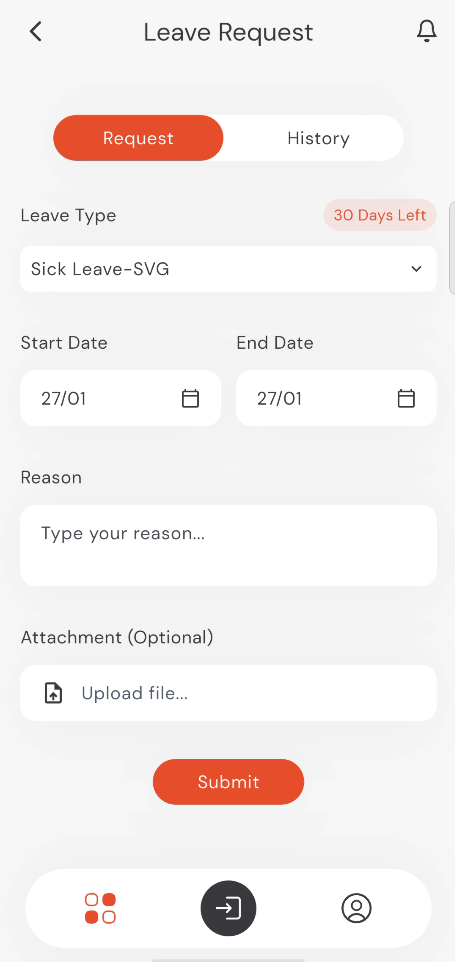
Requesting Leave
- Tap on Leave Requests from the home screen.
- Choose your Leave Type from the dropdown menu:
- Sick Leave
- Casual Leave
- Annual Leave
- Leave Without Pay
- Once selected, a balance indicator tag (e.g., "30 Days Left") will appear to show your remaining balance for that specific leave type.
- Select your Start Date and End Date.
- Provide a Reason for your leave.
- Attachment (Optional): You can upload supporting documents (like doctor reports) by tapping Upload file....
- Tap Submit.
info
Note: All fields are mandatory, including the Reason field (except for the Attachment, which is optional).
9:41
●●●●○WiFi100% 🔋
Leave History
You can monitor your submissions in the History tab. Each entry shows the leave type, dates, and the current approval status.
9:41
●●●●○WiFi100% 🔋

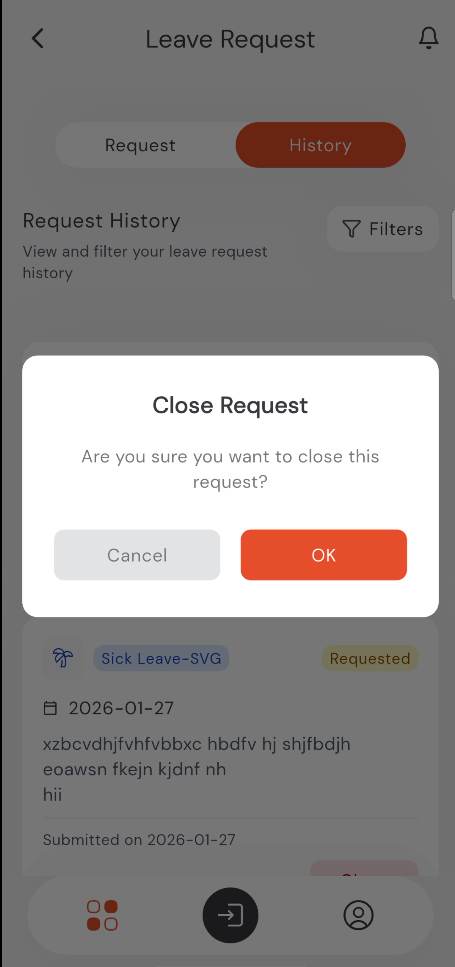
Closing a Request
If you need to cancel a request before it has been processed:
- Tap the Close button on the request card.
- A confirmation dialog will appear.
- Tap OK to finalize closing the request.
9:41
●●●●○WiFi100% 🔋
info
Once closed, the request will move to the Closed status as described in the manager's workflow.
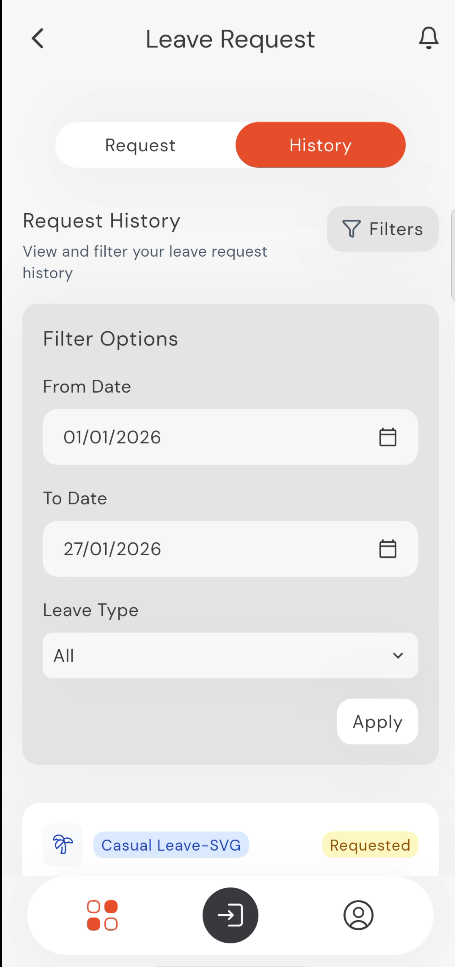
Filtering History
To find specific entries in your history:
- Tap the History tab.
- Tap the Filters button at the top right.
- Set your From Date and To Date range.
- Optionally, select a specific Leave Type (or "All").
- Tap Apply.
tip
The filtering process is the same across all request types (Leave, Overtime, and Shift Requests).
9:41
●●●●○WiFi100% 🔋